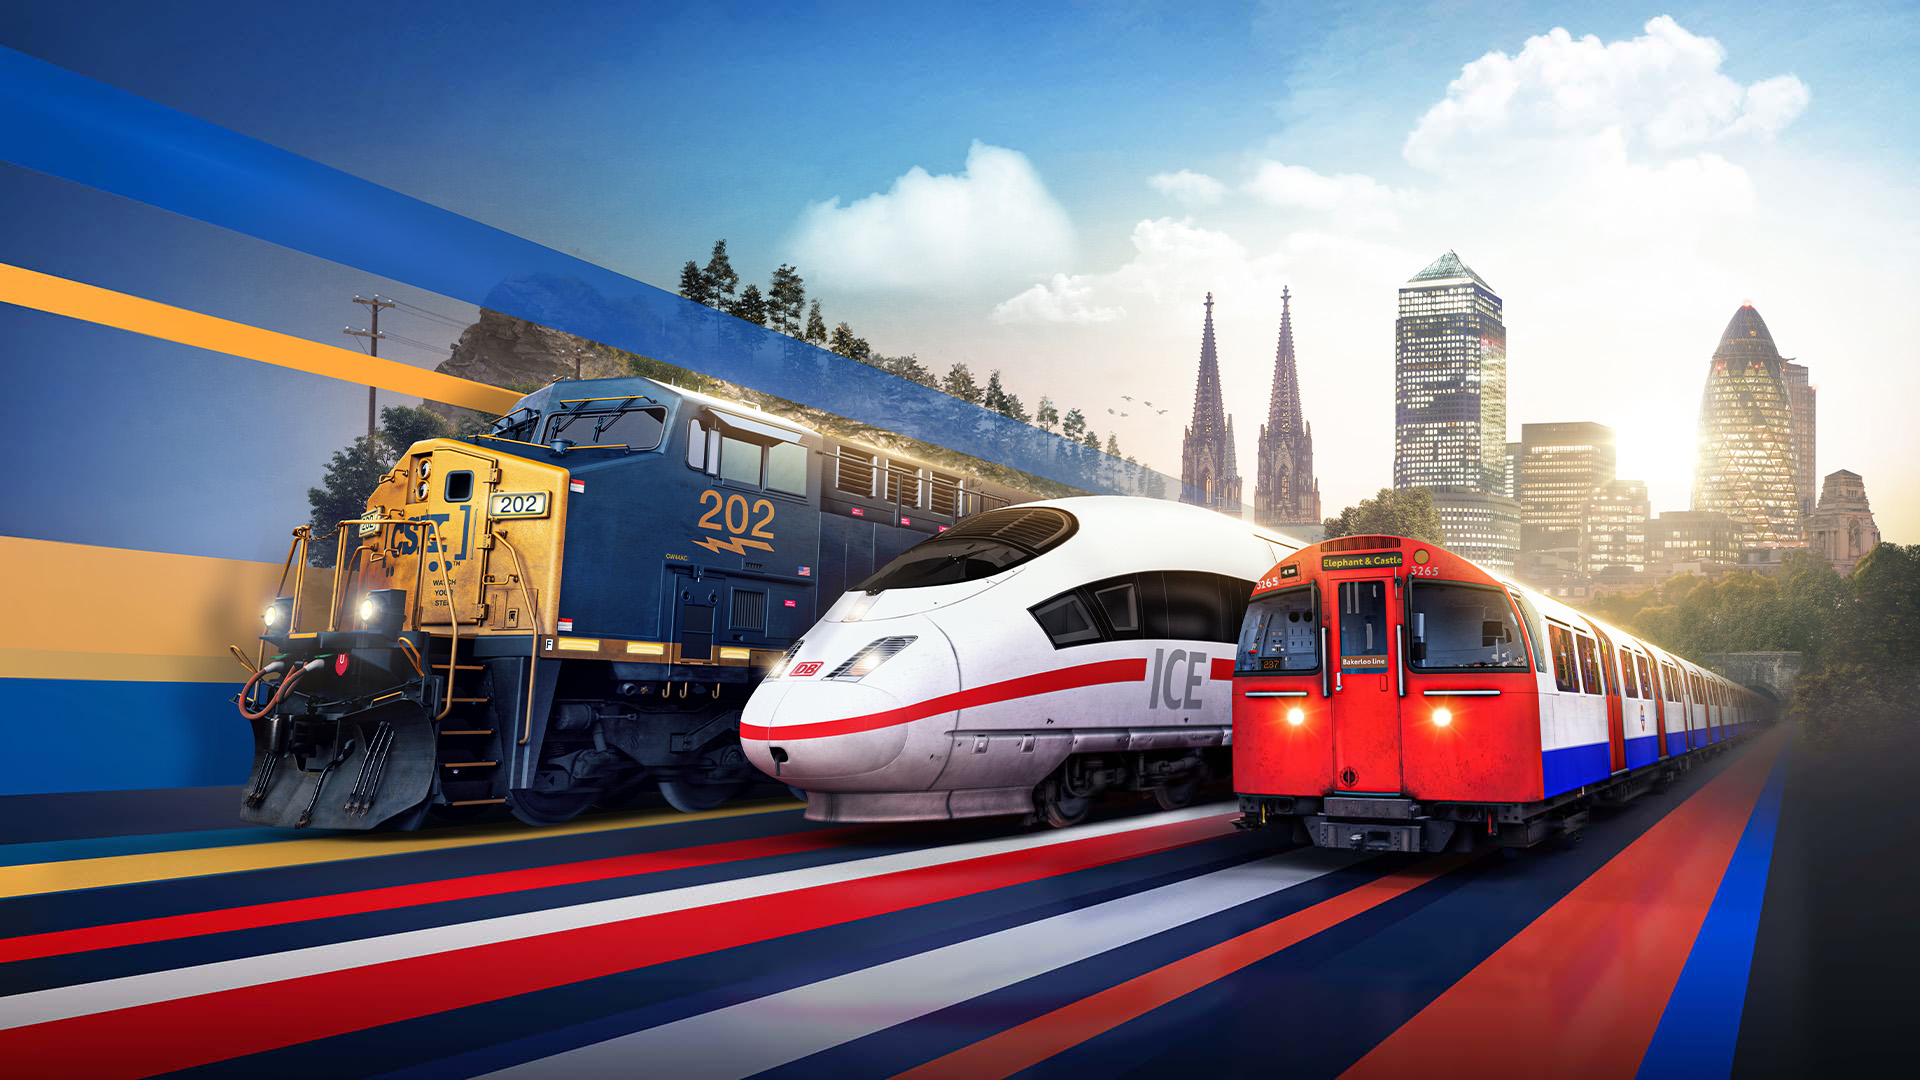
Train Sim World 5
Dev Deep Dive: Implementing Livery Designer Compatibility
We’ve had a few questions in recent Roadmap streams around Livery Designer compatibility as part of the Preservation Crew’s work. For this month’s Roadmap, we’ve enlisted the help of Jake, a 3D artist from the Pres Crew, to give you the lowdown on the work involved, and how we get them into game. Enjoy!
Hey rail fans! My name is Jake, and I am a 3D Artist on the Preservation Crew here at Dovetail Games. There have been a few questions regarding why each Preserved Collection update does not also add Livery Designer compatibility to the included trains, so, we thought we would give a behind the scenes look at the work involved. This isn’t a small task, so grab a drink and a snack and let’s get to it!
STEP ONE – STATE OF THE MODEL
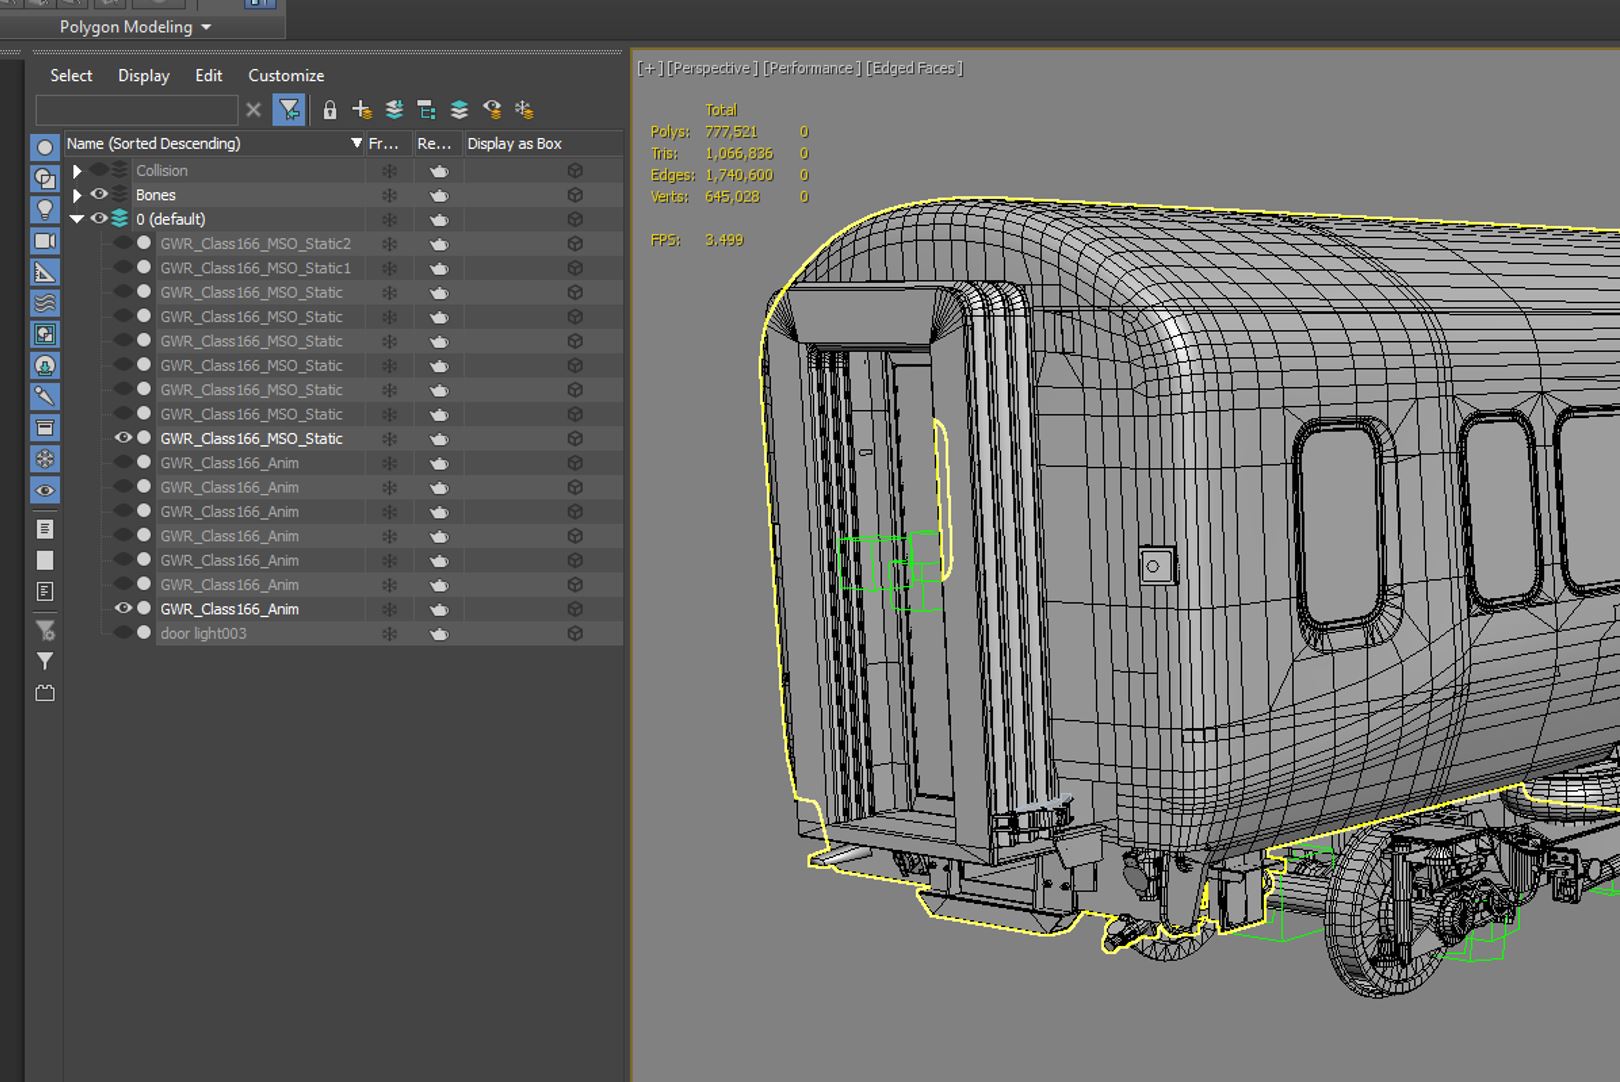
As Train Sim World has been in development for several years, there is a vast array of rolling stock and naturally for such a long production there has been changes to methods and practices over that time. How we model trains now is not how they were modelled to begin with. So, the first task for any train to be made Livery Designer compatible is to understand where all the parts are.
The below images show how I found the Class 166 and how I then arranged the parts to be more manageable in the modelling software (in our case – 3D Studio MAX).
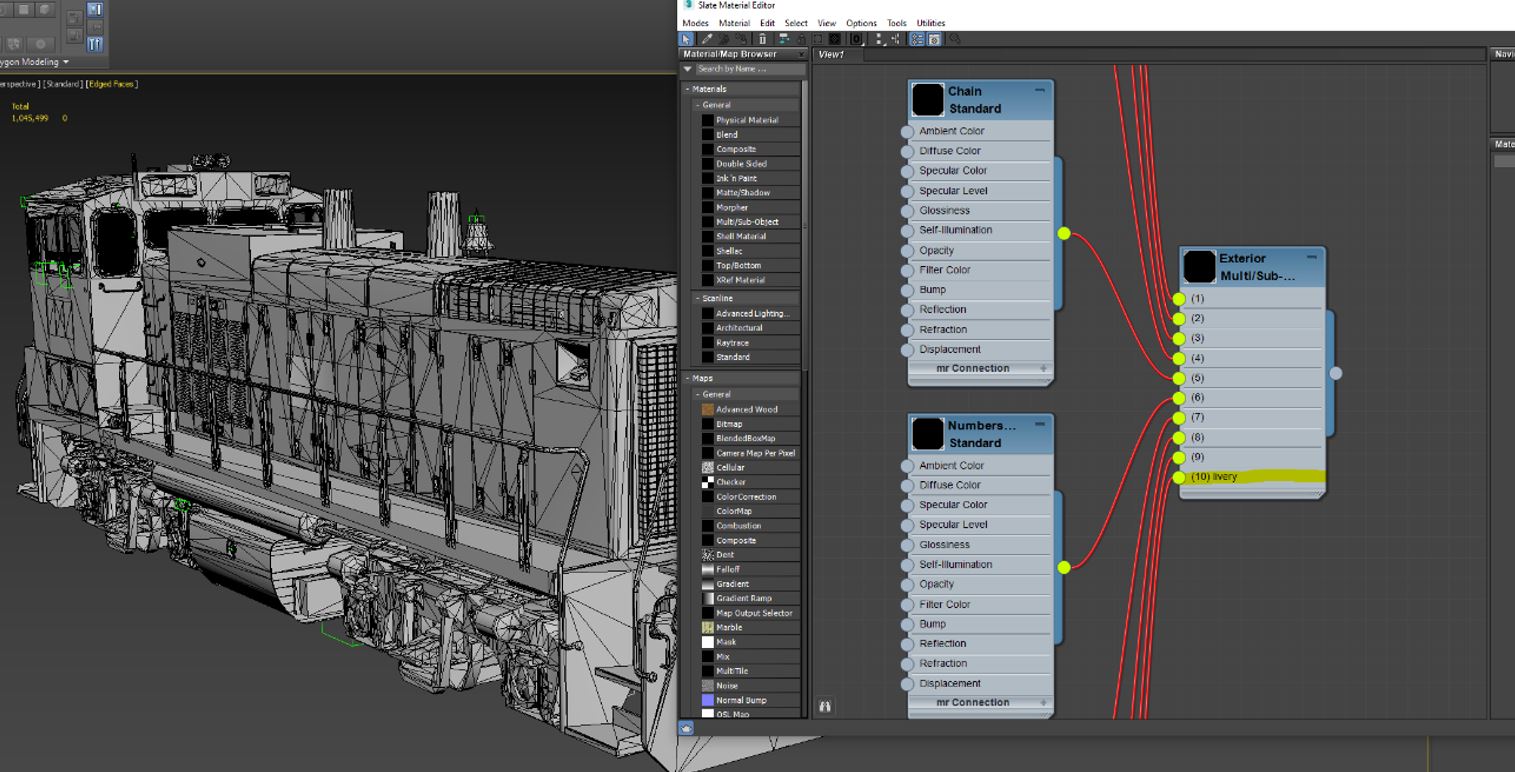
STEP TWO – PREPARATION OF THE MODEL
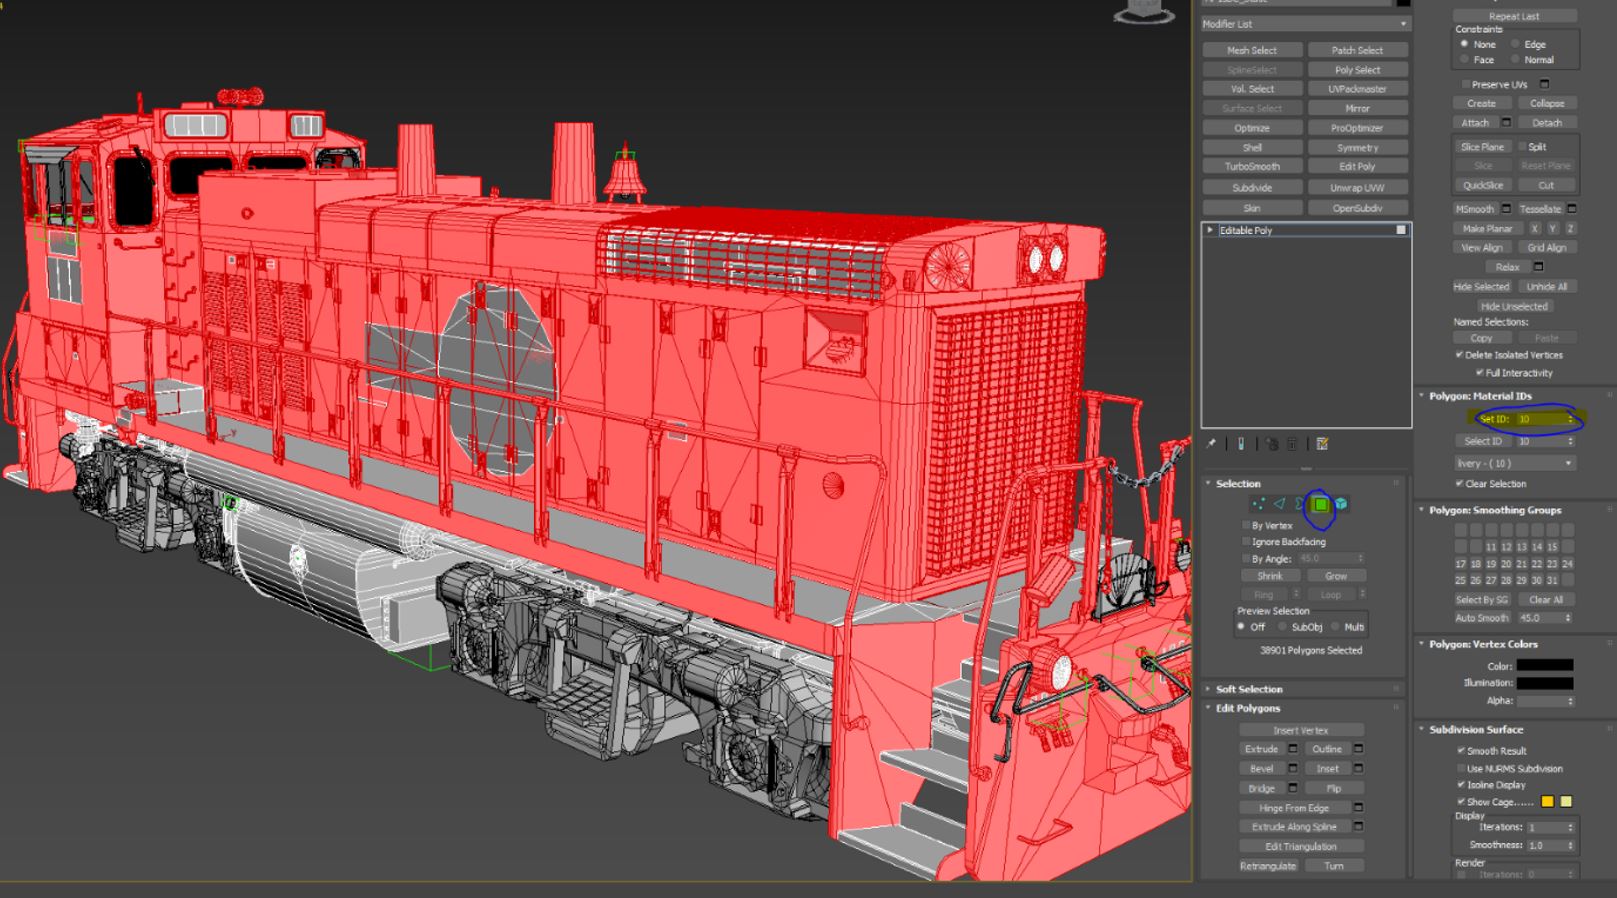
Now the meat of the work required to implement Livery Designer compatibility begins - prepping the mesh and the texture mapping coordinates (called UV’s). In the image below you can see how I have added a new Material ID to the MP15DC model, called Livery. This is the ID we will assign all the surfaces that should be editable in the Livery Designer.
Starting on the highest detail level (known as Level of Detail 0 or LOD 0) I begin selecting parts of the model.
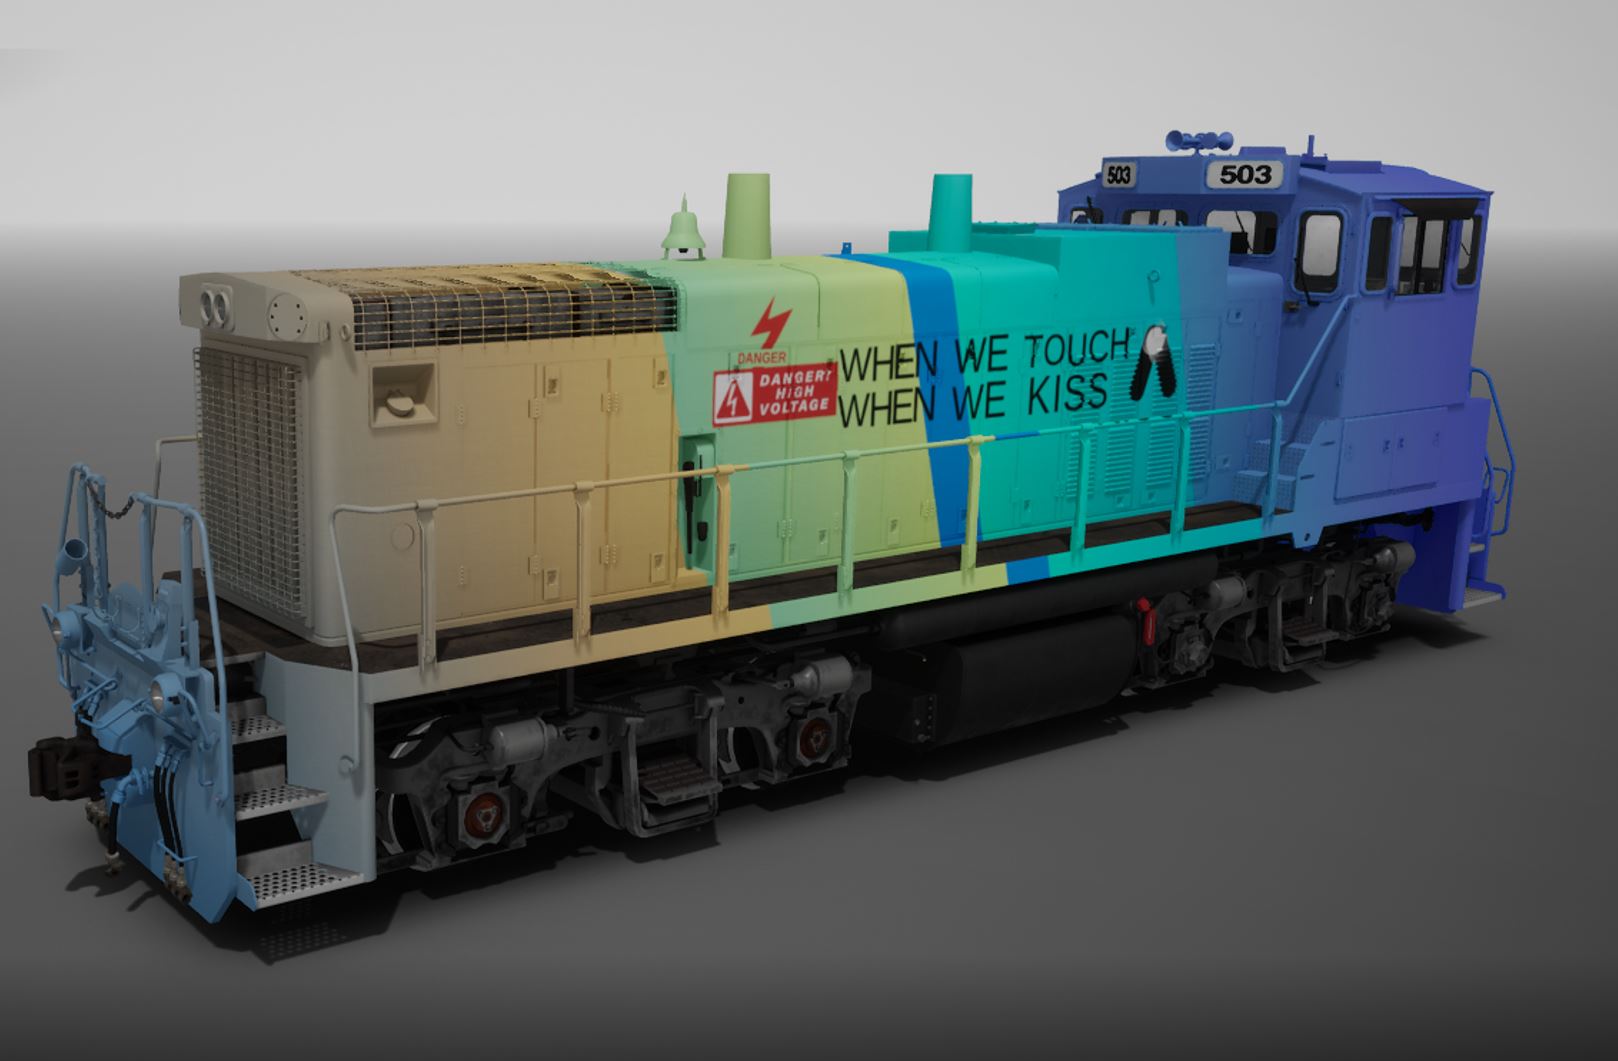
Once I have all the surfaces that should be editable, I hide the rest of the model. This ensures I do not inadvertently change anything that must remain the same on all versions of the train. This includes this like lights, labels, windows, pipes, wheels, and the suspension system.
Now we have the desired parts isolated, we move to working on the texture map. Most rail vehicles are basically mirrored down the middle because left and right sides are usually identical (Why paint both sides separately if you can paint one and flip it!). Of course, this approach doesn’t work for the Livery Designer. Players must be able to paint independent designs on each side of the vehicle. So we must make both sides of the vehicle equally accessible to be edited. Rather than do this manually, we use additional software called UVPackmaster.
With all that done we’ve effectively created a new layer wrapped around the 3D model that we can paint onto.
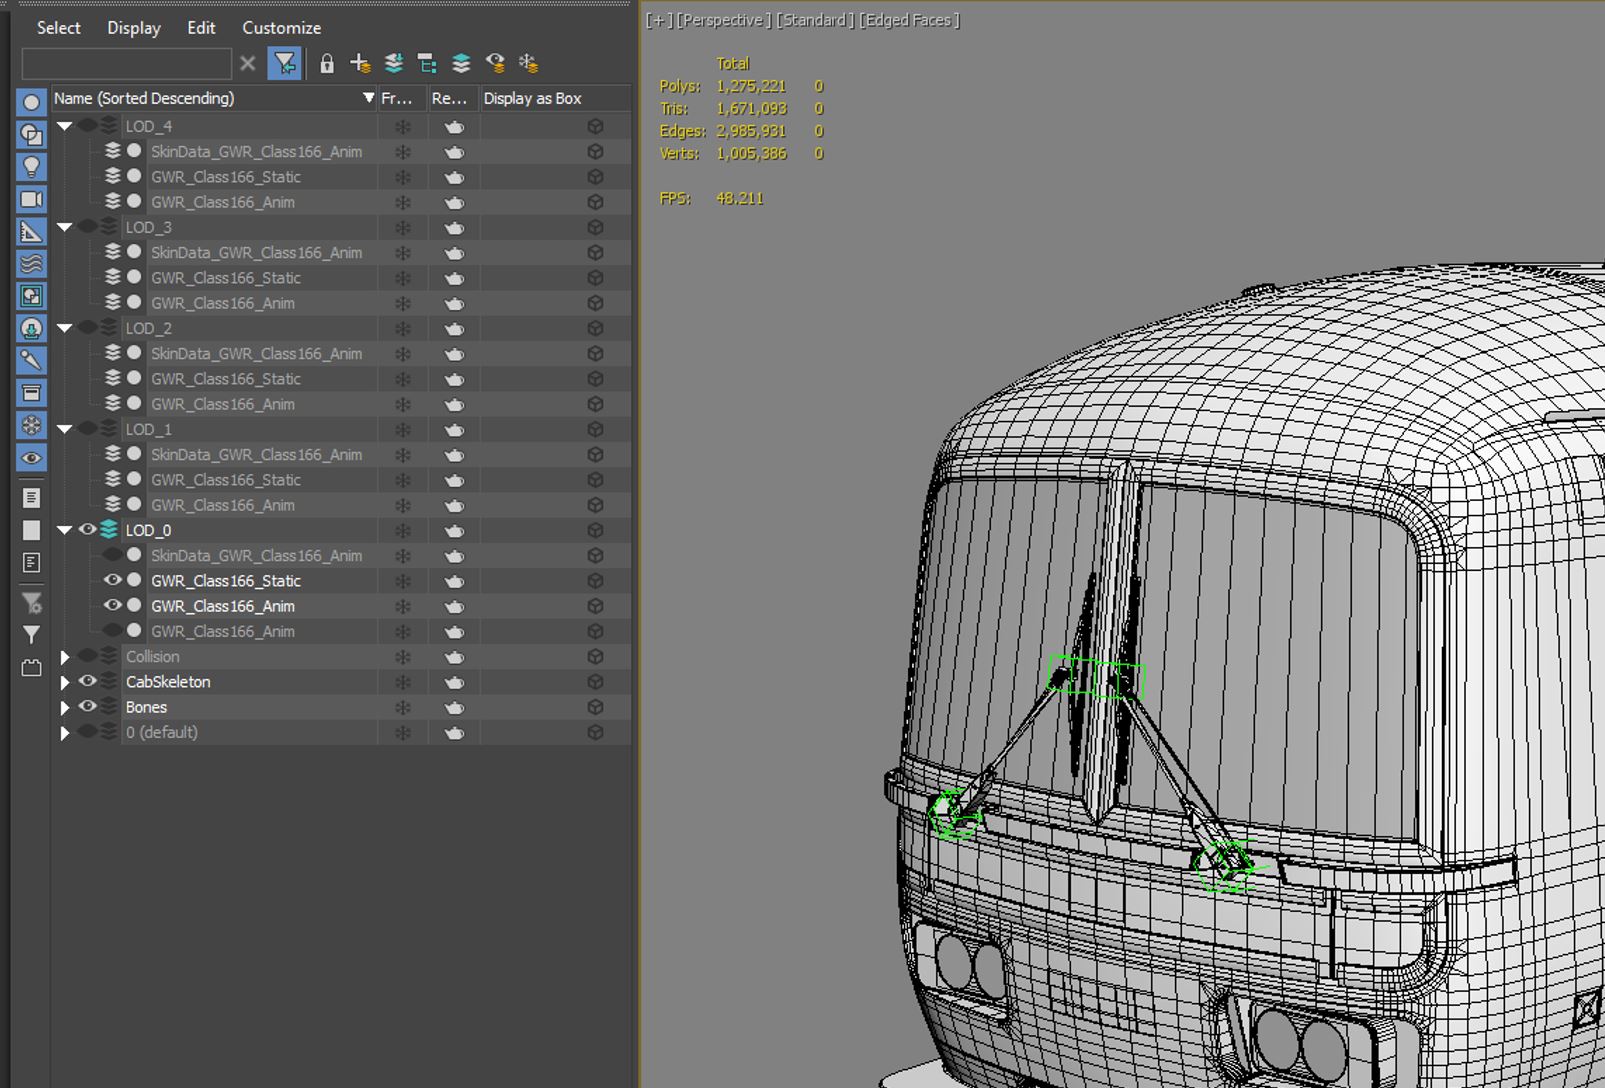
STEP THREE – ‘LEVEL OF DETAIL’
The final task before moving into the Unreal Editor is to create the varying levels of detail required. All the detail of the pipes and switches and roof vents when a train is viewed at close distance are very expensive to render. In video games, as a complete shape moves further away into the distance, at appropriate points elements of those details are removed. For example, a tubular exhaust pipe may be reduced to have just four sides taking it from a cylinder to a box. That way scenery in the background ‘costs’ less to process on the computer hardware. In Train Sim World we have four levels of detail beyond standing next to the object, these are LOD1, LOD2, LOD3 and LOD4. At each level the detail gets more and more simplified.
LOD 1 is always done by manually because it’s the most important step change in detail and occurs relatively close to the player. This is the most time-consuming part of the entire process. I must ensure that any reduction in detail has no visual impact on the shape and texture of the model. Like a cartoon animator flicks back through their characters last few frames, I’m constantly flicking between level 0 and 1 to ensure the changes are minimal.
For the next levels 2,3 and 4 due to the distance at which the switch occurs we can make use of software that automates the process, called Simplygon.
STEP FOUR – SETTINGS FOR USE IN TSW
With the changes to the model now complete it’s time to move into the Unreal Editor and plug the bits together that enable the vehicle to appear in the Livery Designer. For ease of management and maintenance I create a folder to house all the related files in one place, within the folder of the vehicle itself. The main file being setup here is an index of all the important data TSW needs to know – A menu name and representative icon, references to the vehicle itself, references to that material ID number 10 we created in the modelling software (this is the layer wrapped around the model we created in order to paint on), details about what textures of the vehicle should and should not appear when creating a new livery (such as, the detail and colours of the wheels are not touched so we want the follow textures of those parts to still appear alongside any new colours painted on the train), and finally we need to give positional coordinates that the painting tools in the Livery Designer will use to know how to map colours and shapes onto the train.
STEP FIVE - TESTING
With all stages complete, its time to make the updated train accessible. At first the Preservation Crew take a look and review the work, and then if all is good it will be made accessible to our beta testers to start playing with. We create all kinds of designs on the vehicles to see if anything odd occurs while trying to decorate the train in a particular way. Sometimes a handrail might be missed, or a door frame, or a vent grille panel. If that is the case, I need to return to Step Two and run through the process again!
Thanks to Jake for providing us with this information – keep an eye out on the Roadmap articles to find out which future Preservation Crew updates will include Livery Designer functionality for selected locos. In June’s Roadmap, we shared that we’re investigating adding in the functionality for Northern Trans-Pennine's Class 47/4, so keep your eyes peeled for updates, and watch this space!

7
3
1
2
Train Sim World 5
2y
Dev Deep Dive: Implementing Livery Designer Compatibility
Train Sim World 5
3d
Cargo Line Vol.3 - Intermodal: Out Now
Train Sim World 5
23 Apr
Köln - Aachen Timetable Update: Out Now on Steam!
Train Sim World 5
22 Apr
Xbox Add-on Sale - Now On!
Train Sim World 5
15 Apr
Cargo Line Vol.3 - Intermodal: Coming Soon
Train Sim World 5
15 Apr
Train Sim World 5: Easter Event 2025
Train Sim World 5
11 Apr
Route Remix Humble Bundle - Out Now!
Train Sim World 5
3 Apr
ECML Diesel Railtour Pack - Out Now!
Train Sim World 5
1 Apr
Train Sim World 5 Roadmap - April 2025
Train Sim World 5
28 Mar
Train Sim World VR: New York Launches Today!
Train Sim World 5
26 Mar
Train Sim World VR: New York - Releasing March 31st
Train Sim World 5
25 Mar
Spoorlijn Zwolle - Groningen: Out Now!
Train Sim World 5
18 Mar
ECML Diesel Railtour Pack - Coming Soon!
Train Sim World 5
18 Mar
Cardiff City Network - Out Now!
Train Sim World 5
17 Mar
Mattel’s Thomas & Friends™ is here in Train Sim World!
Train Sim World 5
14 Mar
Spoorlijn Zwolle – Groningen: Coming Soon!
Train Sim World 5
6 Mar
Cardiff City Network - Coming Soon!
Train Sim World 5
4 Mar
London Overground Mildmay line - Out Now!
Train Sim World 5
3 Mar
Train Sim World 5 Roadmap - March 2025
Train Sim World 5
27 Feb
Train Sim World VR: New York – Pre-order Now!
Train Sim World 5
18 Feb
Metrolink F59PHR - Out Now!
Train Sim World 5
18 Feb
London Overground Mildmay line - Coming Soon!
Train Sim World 5
11 Feb
Mittenwaldbahn - Out Now!
Train Sim World 5
3 Feb
Train Sim World 5 Roadmap - February 2025
Train Sim World 5
31 Jan
Mittenwaldbahn - Coming Soon!